LTI integration with Notebook.link
This guide describes different course workflows such as creating, distributing, submitting, grading, and re-generating assignments using an LMS (Learning Managment System, e.g., Moodle, Canvas, etc.) via the notebook.link LTI bridge for courses.
Overview
To support the workflow items below, the system relies on Correxit, which is a kernel-agnostic Jupyter extension for grading Jupyter notebooks.
Here are workflows for common course-related tasks.
- Assignment creation and propagation: a teacher creates an assignment and distributes individual student notebooks (Assignment Propagation workflow).
- Student submission: a student opens an assigned notebook, completes the assignment, and submits it.
- Grading: a teacher reviews and grades student submissions and publishes the grades to the LMS.
- Rewriting student notebooks: a teacher re-runs the Assignment Propagation workflow again to regenerate or update student notebooks (e.g., for newly enrolled students).
- Multiple teachers: Several teachers can manage and teach the same course.
- Access to Dashboard: to access the rest of notebook.link.
- Sync grades from an LMS: the LMS is the source of truth, so if the teacher has overridden grades for some students, they are synced with notebook.link.
Assigning an Assignment
Prerequisites
Before creating an assignment, the teacher should:
- Create a course in an LMS (Moodle, Canvas, etc).
- Enroll students into the course.
- Make sure that notebook.link is available as an External Tool in their LMS.
Creating an External Tool Assignment
In Moodle:
- Open the course.
- Enable Edit mode.
- Select Add content.
- Select Activity or resource.
- Select the configured External Tool.
- Fill in the required fields.
- Save the activity.
The teacher can then open the created External Tool link.
Non course case
If the External Tool link does not have course context then a user who clicks on it will be redirected to Connections (/launcher/connections)
First-time course creation
On notebook.link we differentiate projects from courses, teaching workflows, enrolled students, and LTI integration are only available for courses in notebook.link.
-
Click the External Tool link: If the course is new, this automatically creates it in the app and opens the course form to configure the course project environment.
-
Configure the project environment: Fill out the required settings.
-
Click "Save & run: This launches the course and unlocks the Assignment Propagation workflow.
If a teacher cancels the initial setup:
-
Result: The course project is not created.
-
Manual Setup: This is one of the two ways how to run the course project. In this case the teacher can navigate to the Course section (/launcher/courses) and open the Edit course dialog to add an environment manually.
-
Activation: After adding the environment, the teacher has 2 ways to run the course project:
- Navigate to the course page and click the Launch Grader button. From here, the teacher can initiate the Assignment Propagation workflow and have the list of all course assignment.
- by clicking the External Tool link inside the LMS course
There is also another way to run the course project that is to click again on the External Tool link on the LMS course and see again the same dialog for selecting the project environment.
Also a teacher can change course and assignment configuration via dedicated Edit dialog windows
All External Tool links added to the LMS course will then be transformed into notebook.link assignments.
The relationship is:
One External Tool link = one assignment
Creating and Propagating an Assignment
If the teacher has just created a course and opens the External Tool link, they will be redirected to JupyterLite part of notebook.link.
From there, the teacher can:
- Create or prepare a notebook.
- Transform the notebook into a workbook assignment.
- Start the Assignment Propagation workflow by distributing the assignment workbook to all students enrolled in the LMS course.
After Assignment Propagation is completed, each enrolled student receives access to their own assignment files.
Result
Each student enrolled in the course gets their own copy/access to the files required to complete the assignment.
Student Submission
After the teacher completes the Assignment Propagation workflow, students can work on and submit their assignments.
Opening an Assignment
The student should:
- Log in to the LMS using their own account.
- Open the course created by the teacher.
- Find the assignment link provided by the teacher.
The teacher should provide students with:
- The course name.
- The external link name.
When the student opens the appropriate link, they are redirected to the notebook.link student UI.
Starting the Assignment
In the student UI, the student will see the current assignment, in case it has been assigned to the student, and the student will be prompted to continue working on it.
When the student clicks the Start Assignment button, they are redirected to the JupyterLite part of the notebook.link.
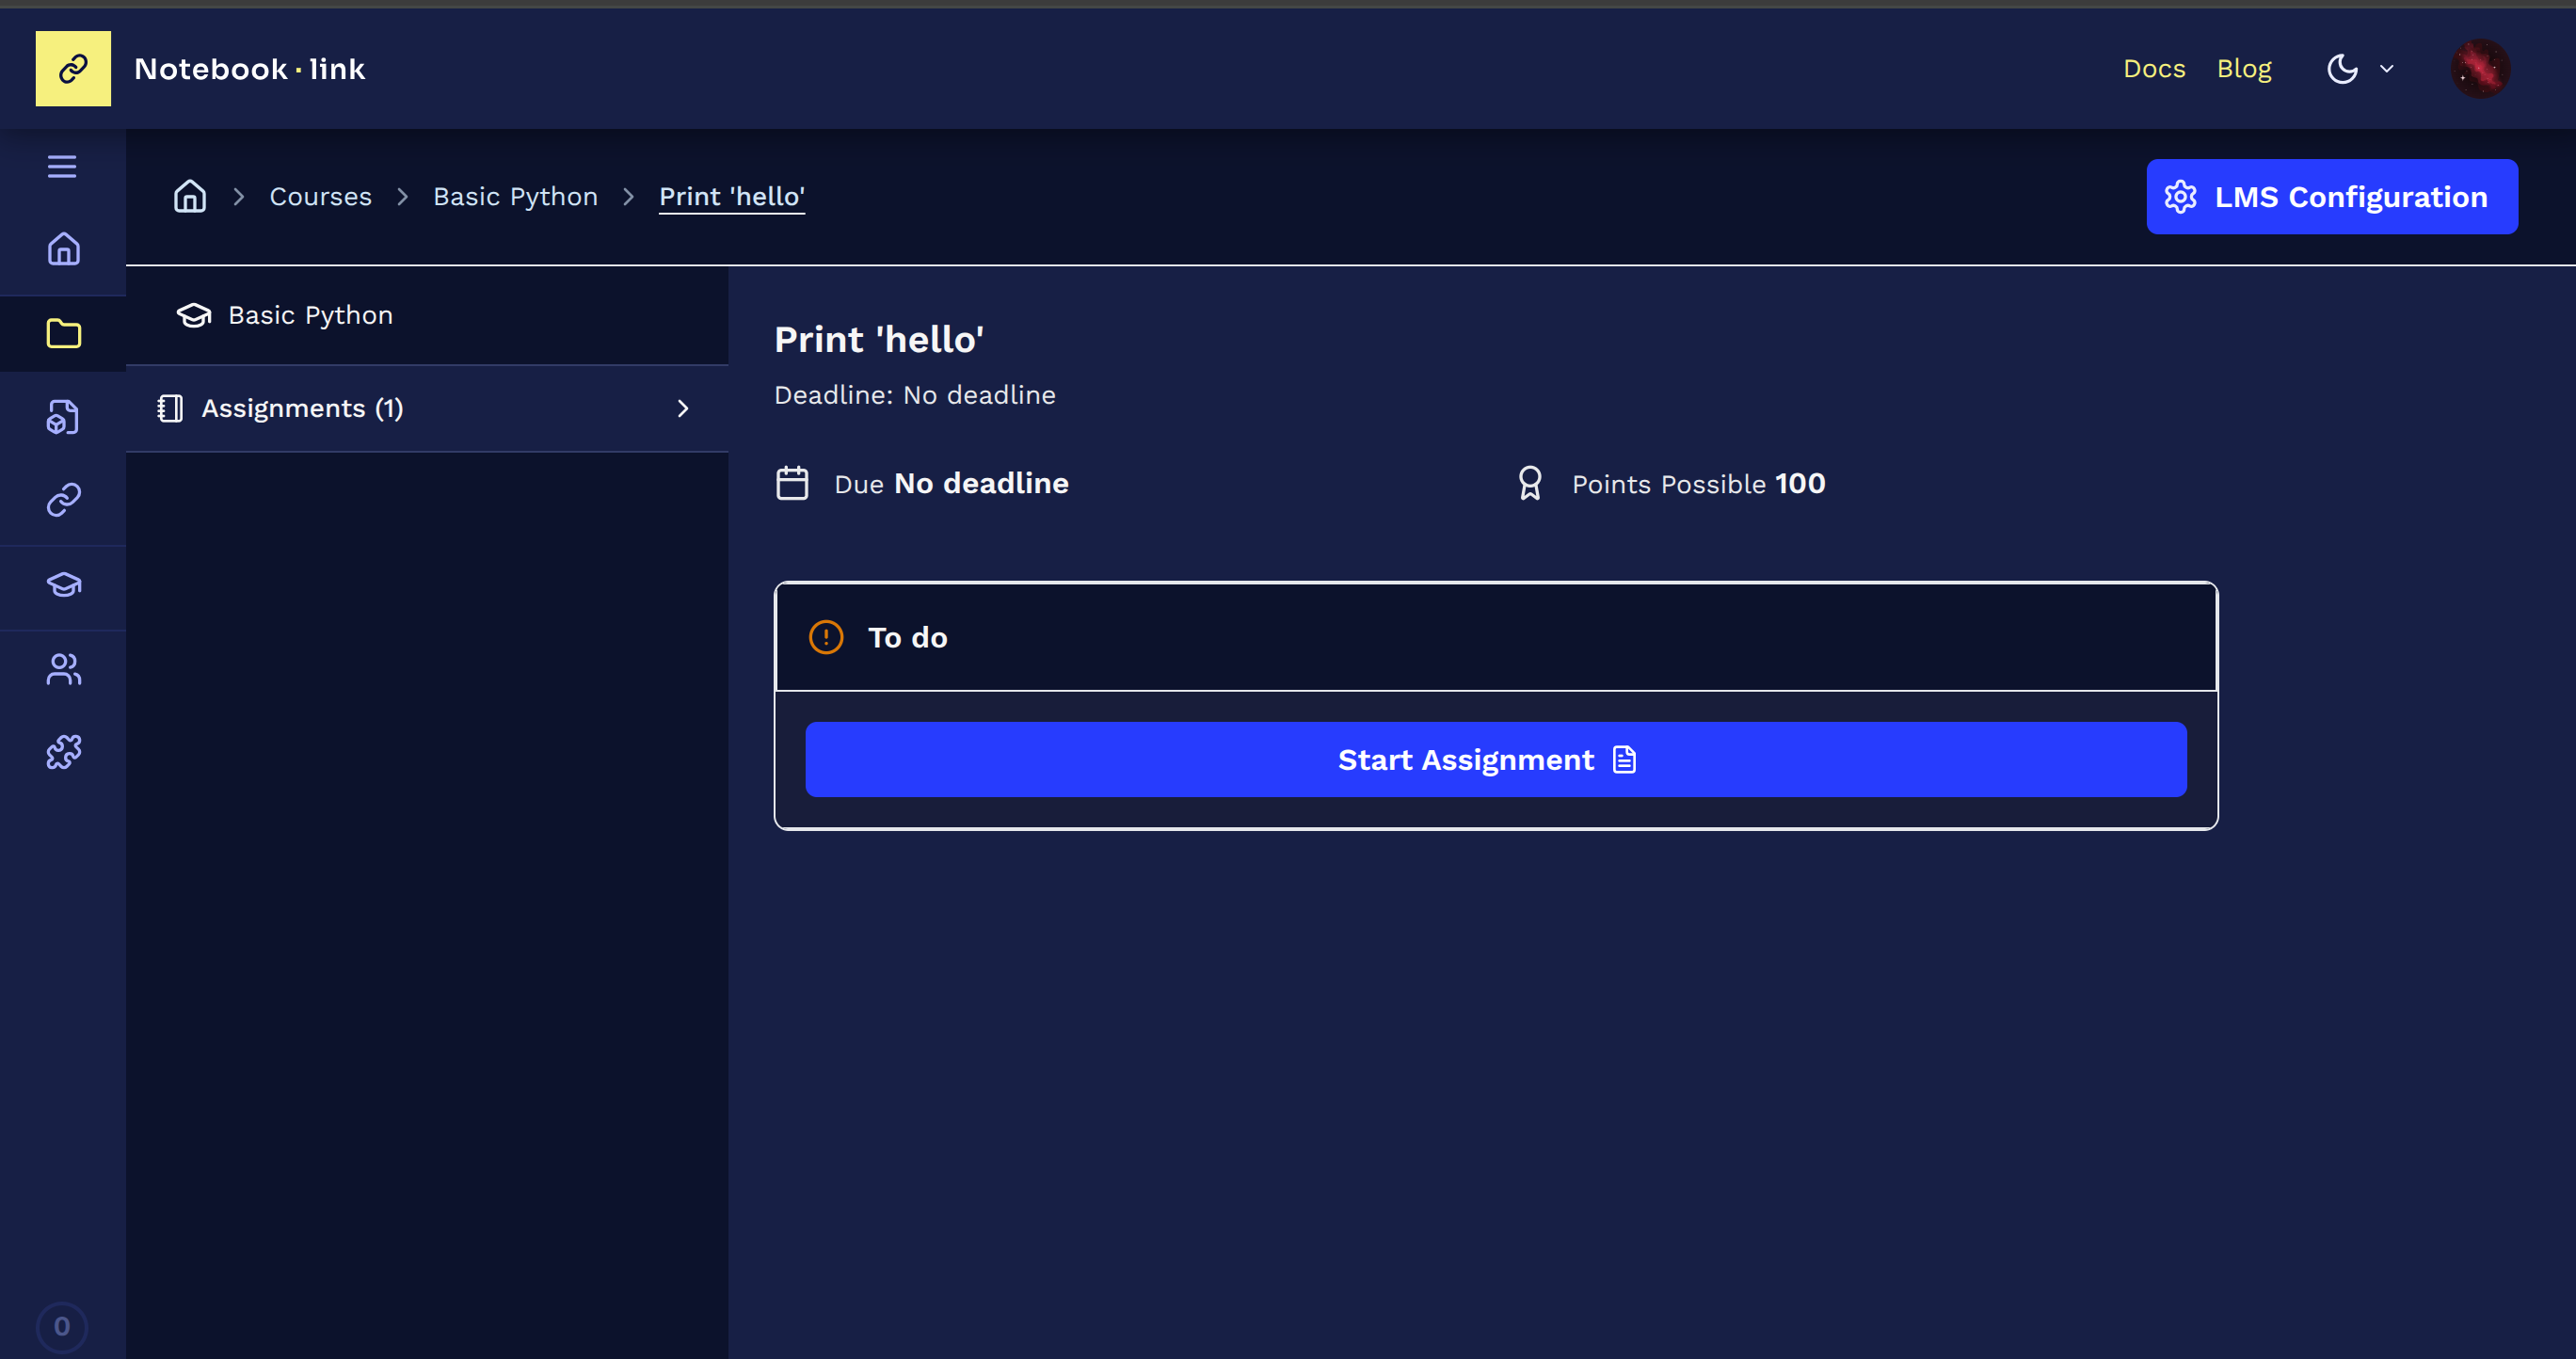
The student can then:
- Complete the assignment.
- Save their work.
- Submit the assignment.
Grading Workflow
After the Assignment Propagation workflow has been completed, the teacher can grade student submissions no matter whether a student has submitted their work.
Opening the Assignment for Grading
The teacher should:
- Open the same External Tool link in the LMS system.
- The teacher will be redirected to the notebook.link teacher UI.
- The current assignment page will be displayed.
- The teacher will see the list of students who received the assignment.
The teacher can select Grade for the assignment.
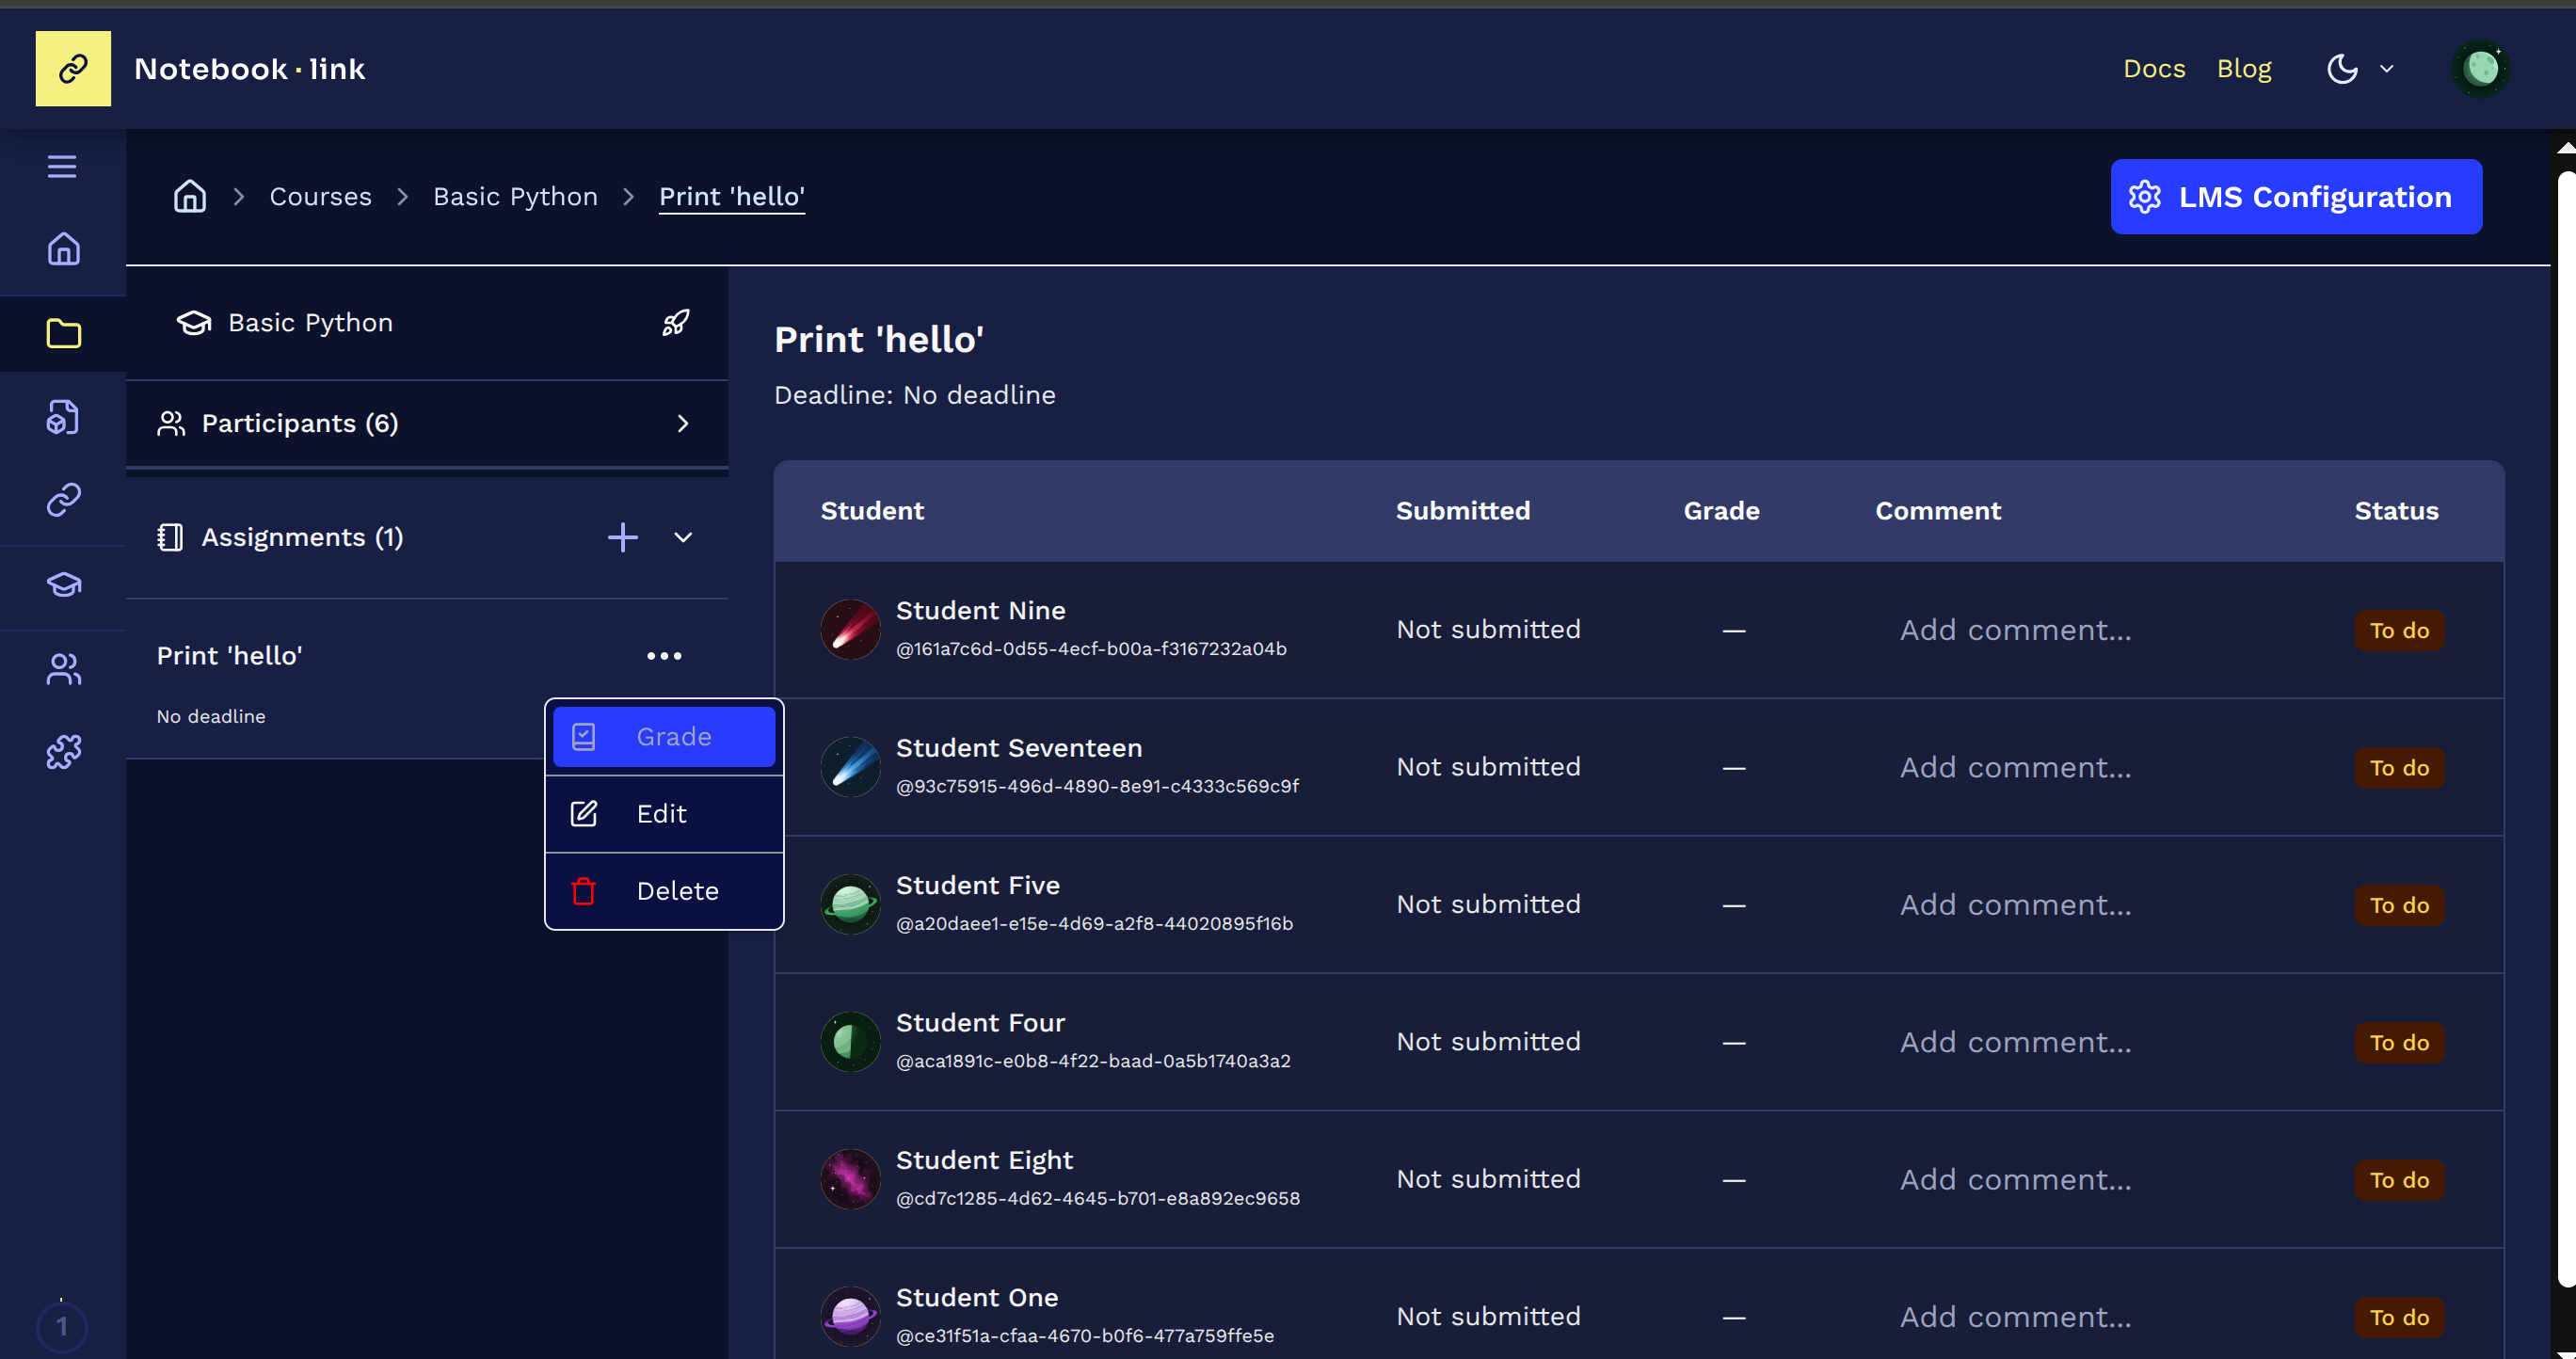
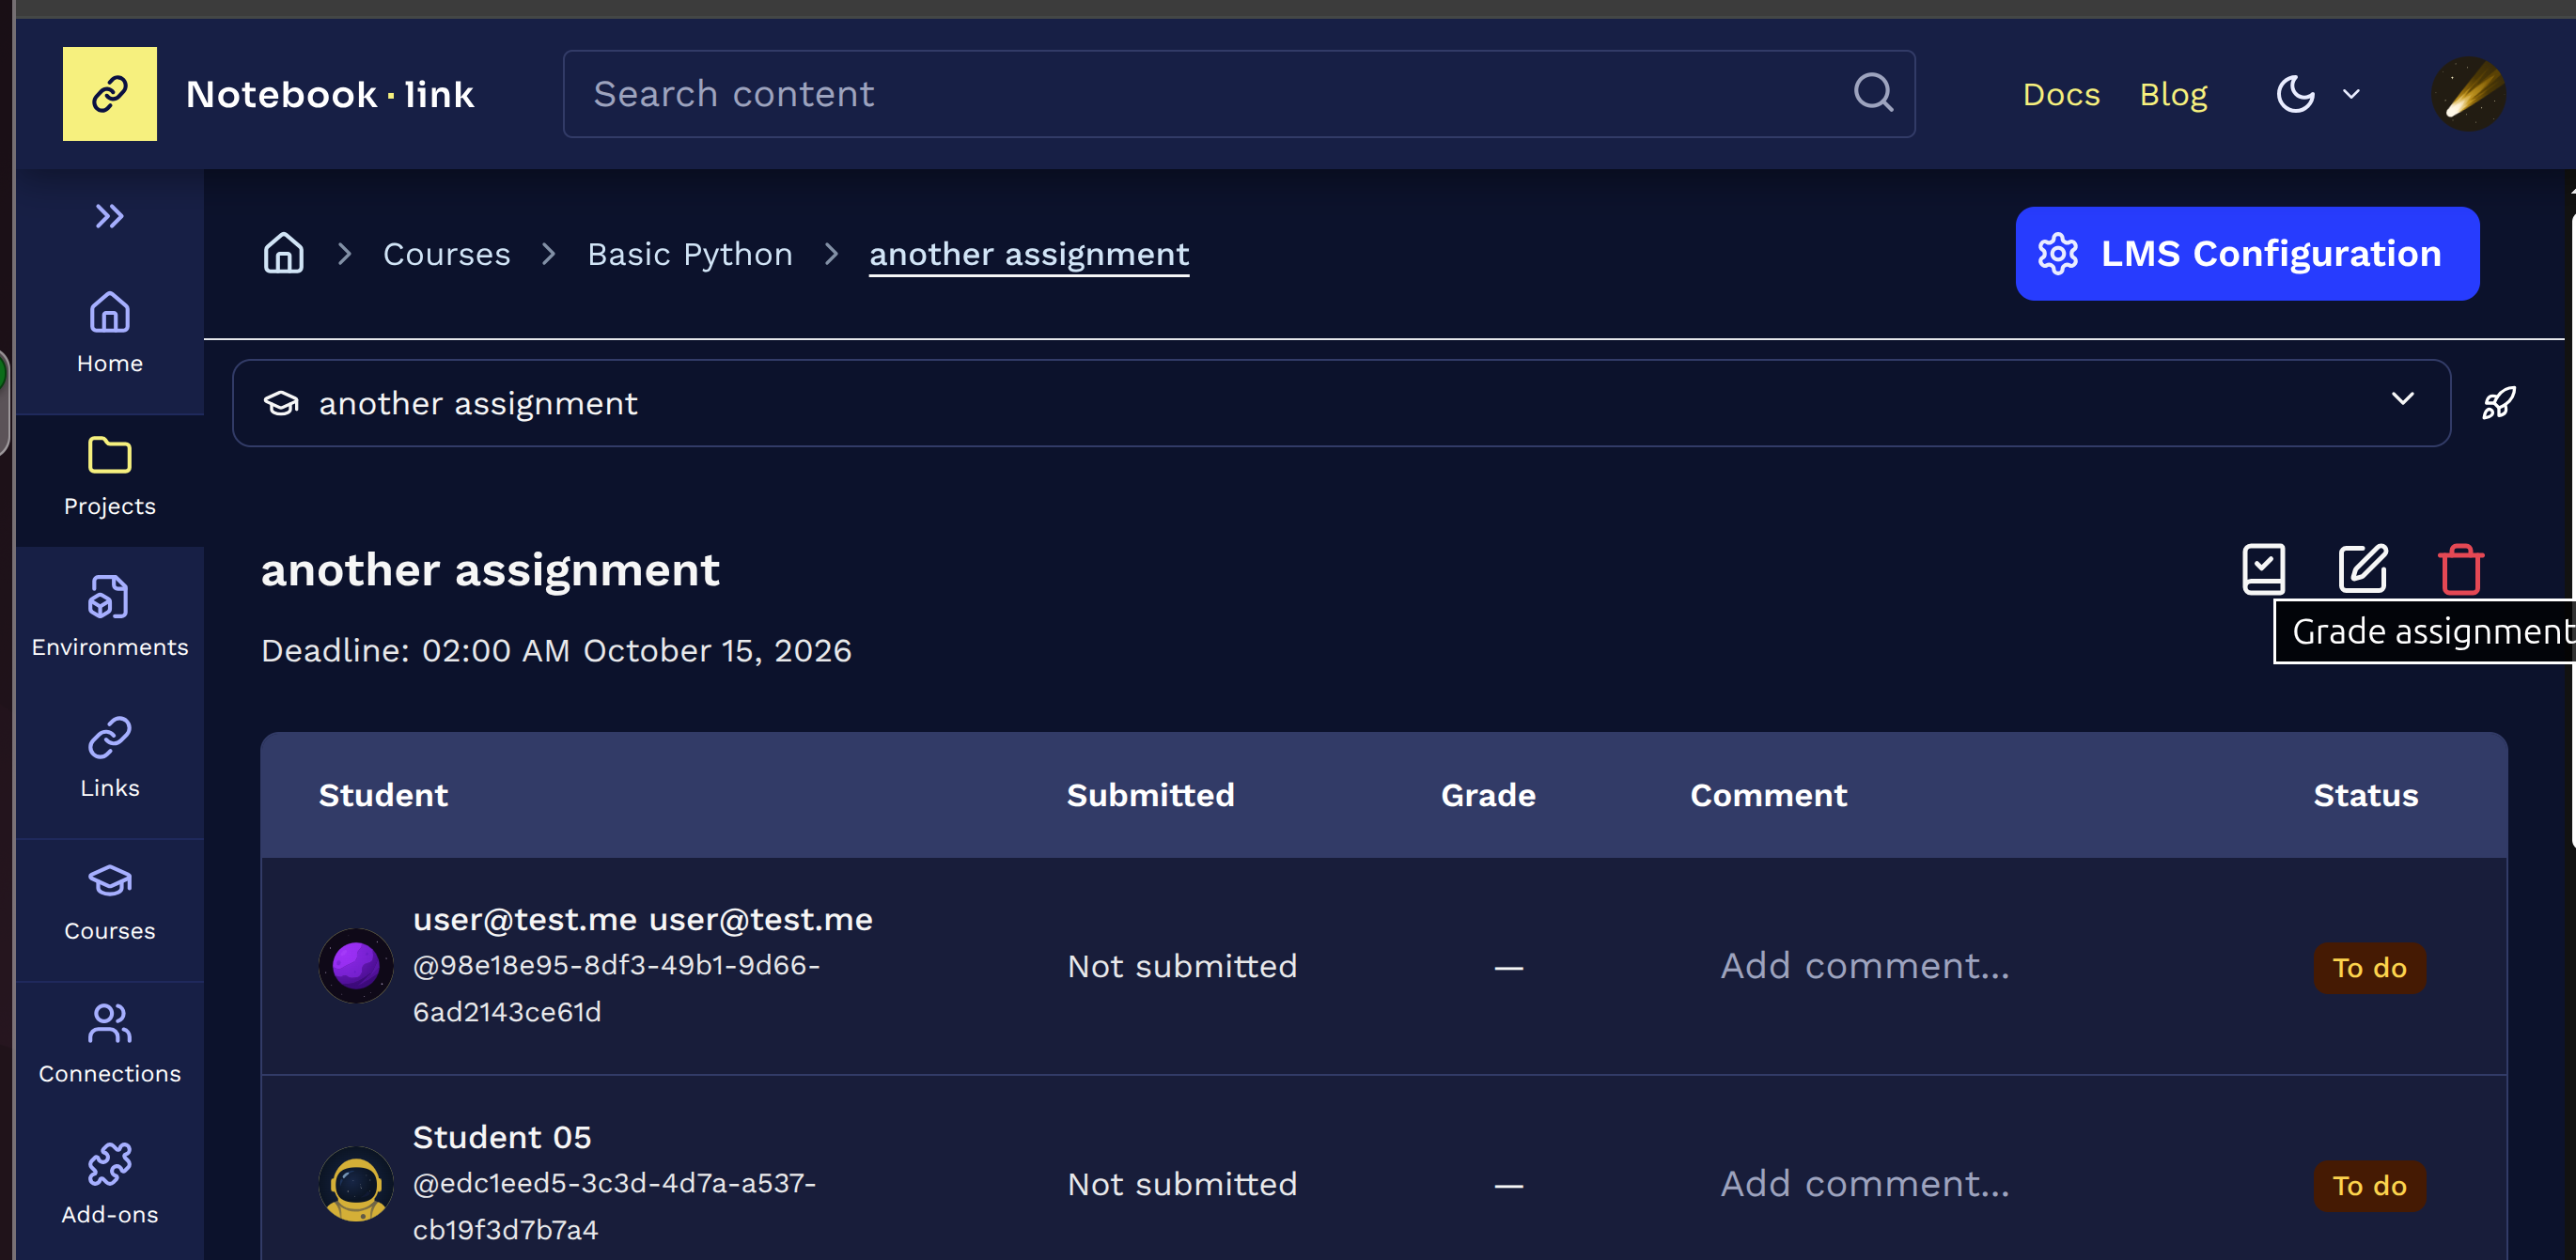
The teacher will then be redirected to the JupyterLite and Correxit.Corrector view will be opened.
Correxit.Corrector View
The Correxit.Corrector view is used to perform the complete grading workflow where the teacher will see several available actions.
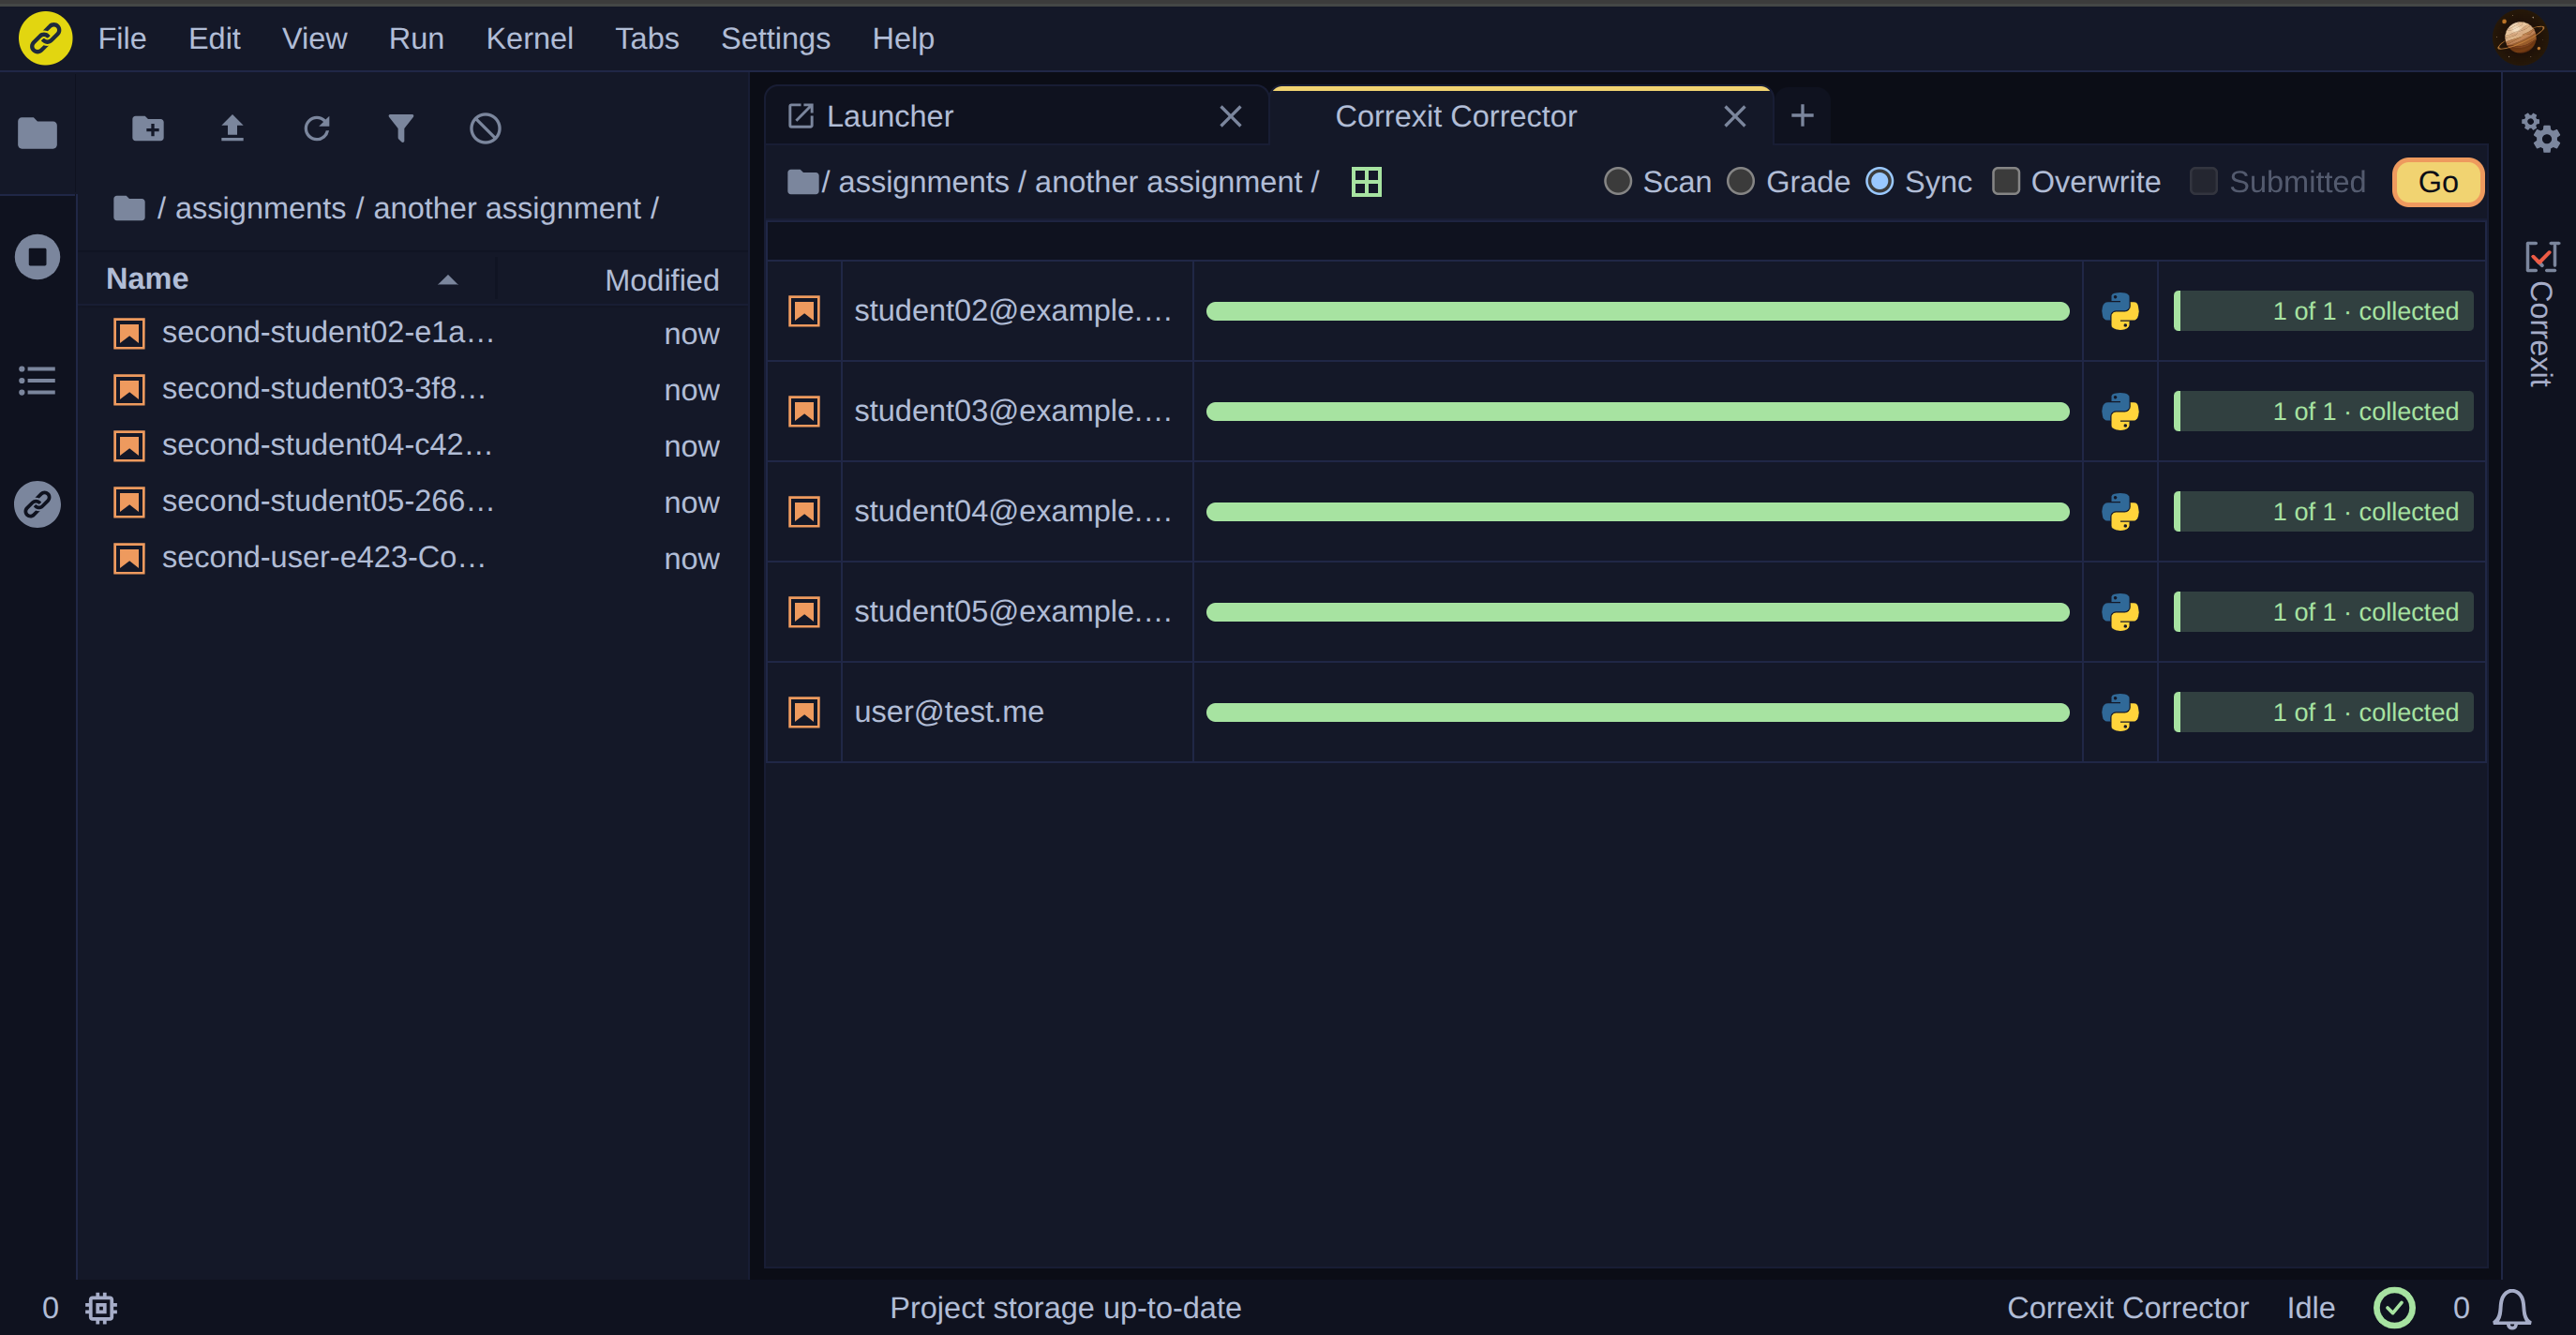
The Grade action runs the grading process.
It evaluates the student's submission according to the assignment's grading configuration.
The Sync action:
- Saves the grades to the notebook.link's database.
- Publishes the grades to the LMS .
After this, grades should be available in the corresponding LMS grading table.
Students can see the grade results
Students can view their scores directly inside their LMS gradebook cell for the selected External Tool link and also by clicking on this link where they will be redirected to the student UI
Manually Edited Moodle Grades
Important: Moodle may prevent the notebook.link from publishing a grade if the teacher has manually edited score in a grade cell directly in the Moodle grade table.
If a teacher manually changes a grade in Moodle:
- The notebook.link may no longer be able to publish its grade to Moodle.
- The teacher can manually update the grade in Moodle instead and grades will be synchronized after clicking on the External Tool link.
- The notebook file graded by the notebook.link will not be updated with the manually entered Moodle grade.
Rewriting Student Notebooks
The teacher can run the Assignment Propagation workflow again after an assignment has already been propagated. This can be used when the teacher needs to regenerate or update the notebooks provided to students. This can be triggered in two ways: via Launch Grader on the teacher UI and clicking on the same External Tool link.
Starting the Propagation Again
The Launch Grader button redirects the teacher to the complete course in JupyterLite part of notebook.link.
From there, the teacher can run the Assignment Propagation workflow again. If the teacher selects "Replace existing", any previously distributed student notebooks will be overwritten.
Result
Running Assignment Propagation again may allow the teacher to rewrite/regenerate the student notebooks according to the current assignment workbook.
Important: Teachers should consider the effect of rewriting on students' existing work before using this workflow.
Several teachers in the same course
It is possible that a course may have several teachers.
Access to Dashboard
An assignment name includes notebook.link
If an assignment includes notebook.link in its name a user will be redirected to the Dashboard page of notebook.link.
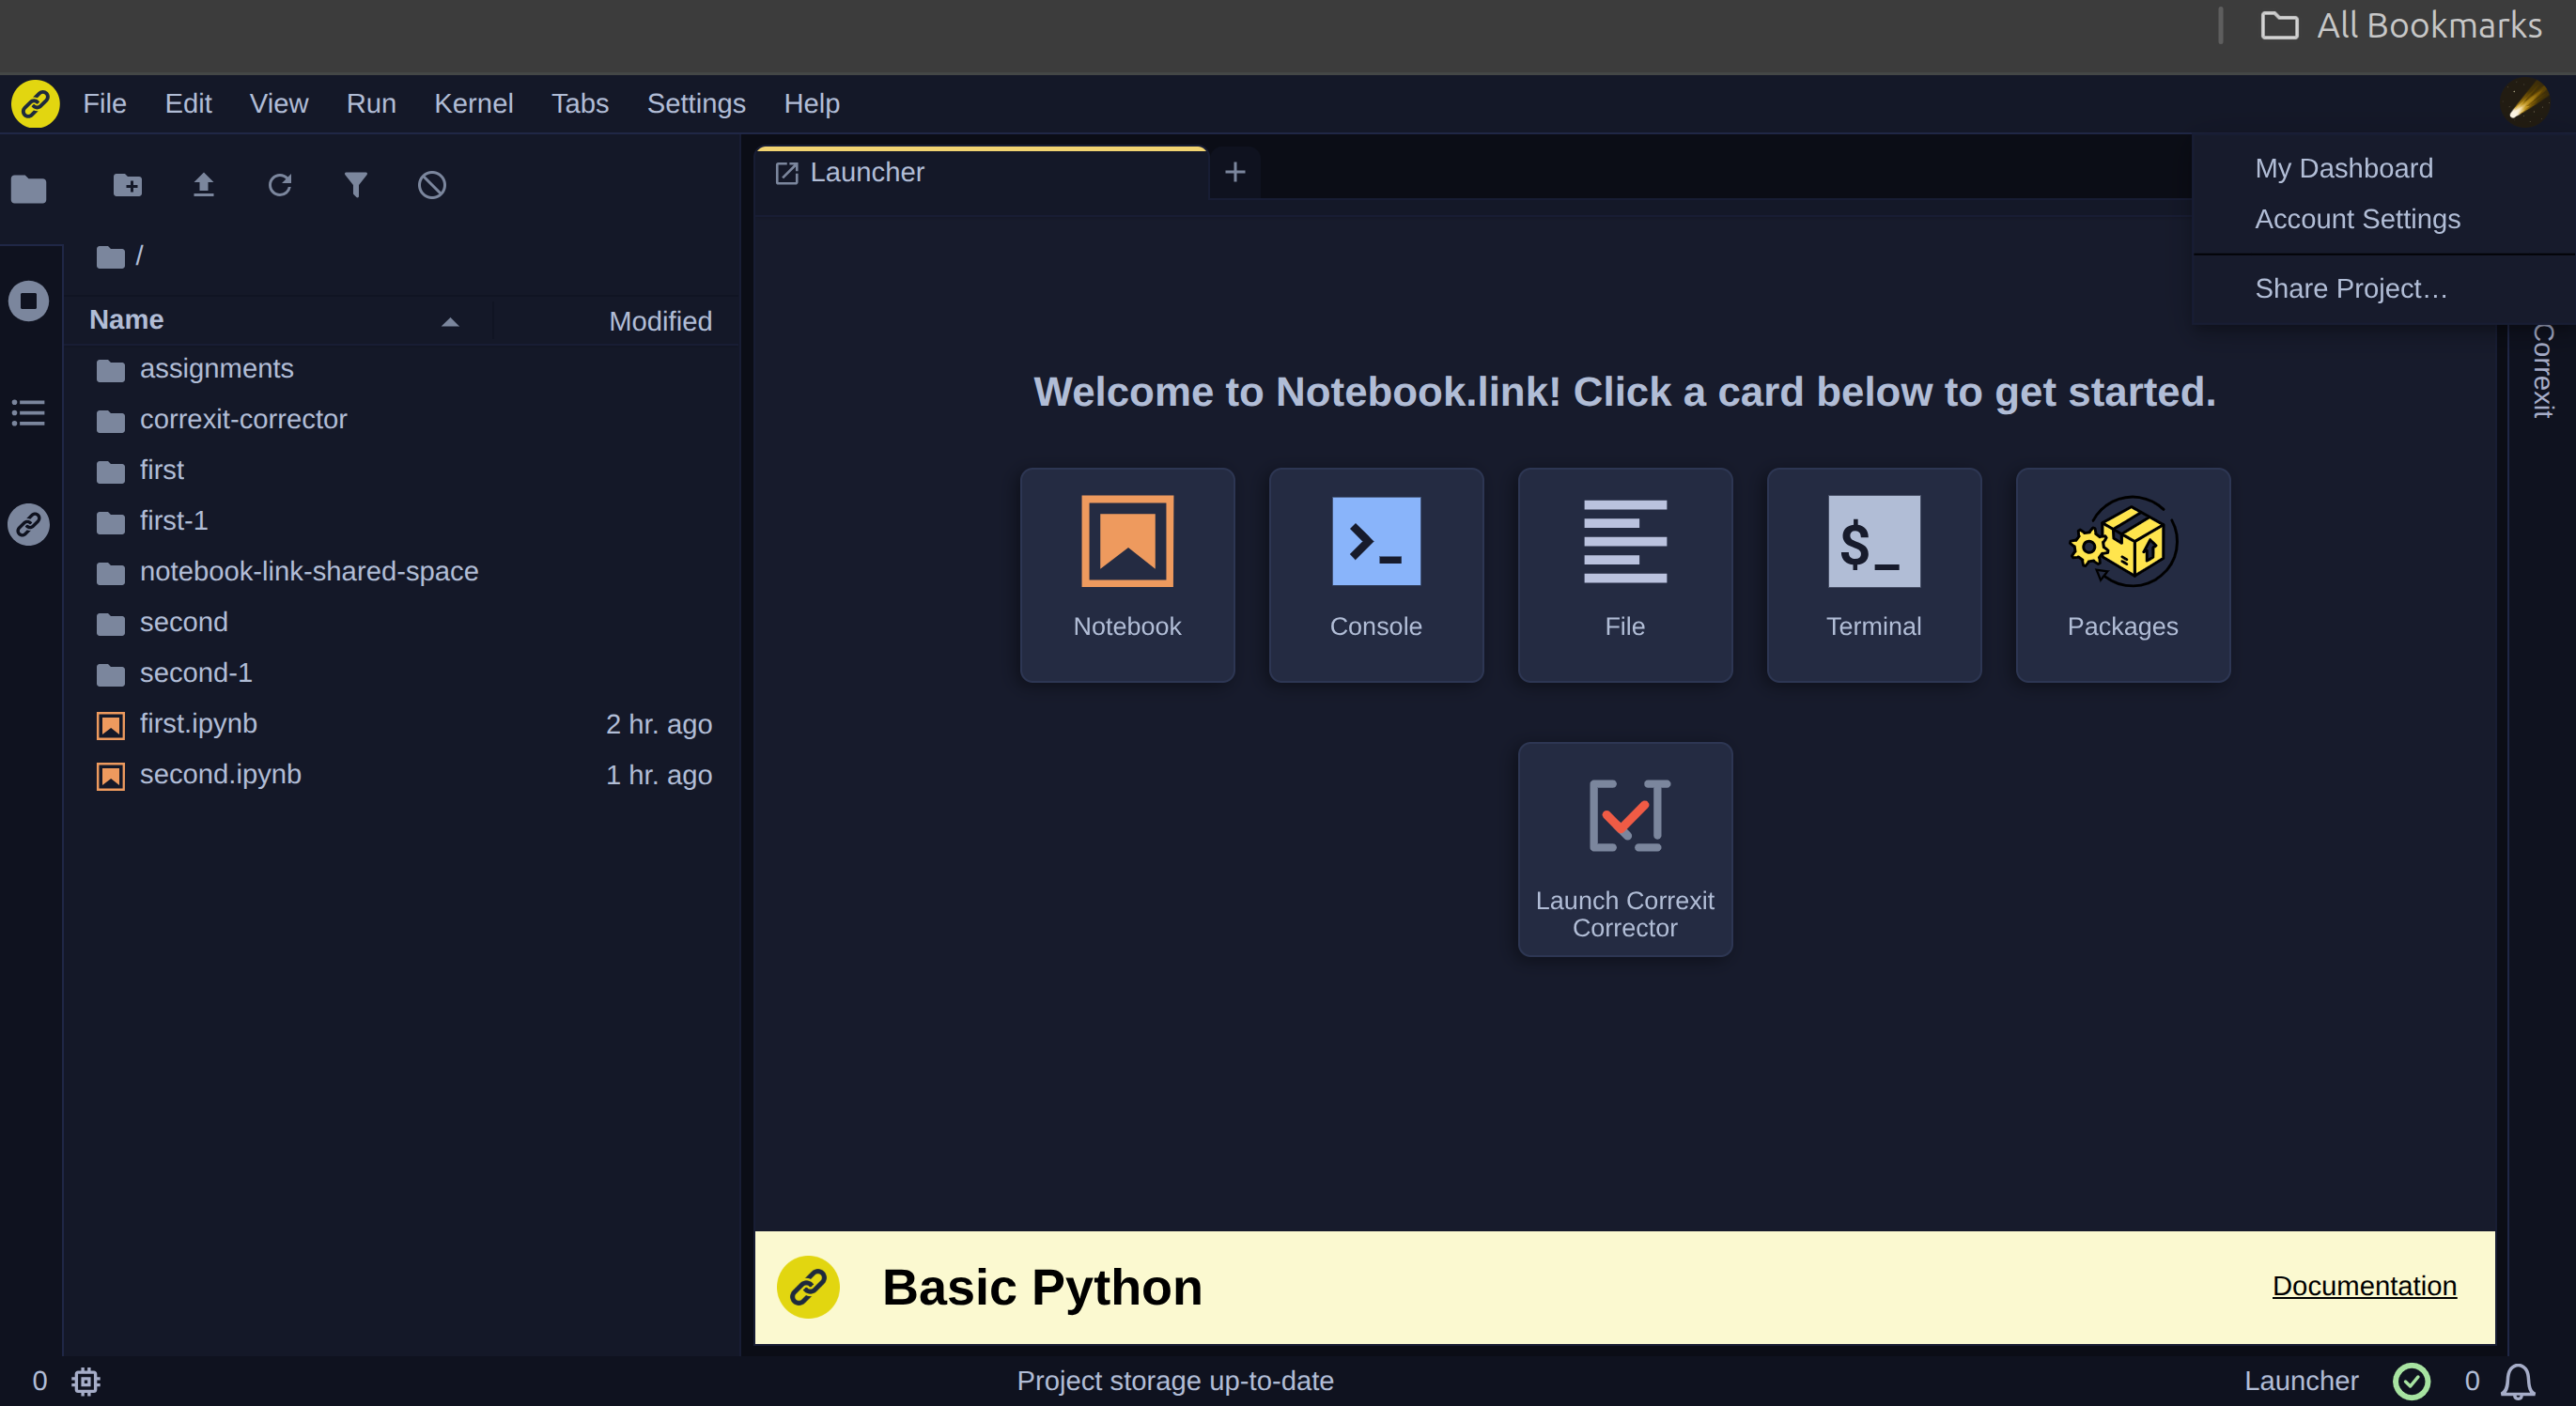
Via My Dashboard in a running course project
Sync grades from an LMS
If a teacher changes grades in the LMS and then clicks on an External Tool link new scores will be synced
Important Notes
- The External Tool link represents one assignment in the notebook.link.
- Students must be enrolled in the LMS course before Assignment Propagation so that they can receive their assignment files.
- Students should use their own LMS accounts when opening assignments.
- Teachers should tell students which LMS course and an External Tool link to use.
- Manually editing a grade in Moodle can prevent the notebook.link from publishing a new grade for that student.
- Re-running Assignment Propagation can rewrite/regenerate student notebooks, so teachers should consider existing student work before using it.