Advanced Configurations
Add-ons Management
Manage your add-ons on the add-ons page.
What Is a Project Add-on?
A project add-on is a JupyterLite extension customized for Notebook.link, typically accompanied by a backend service. To access add-ons:
- Click the puzzle piece icon in the left sidebar menu
- View available add-ons displayed as cards
- Click any card to configure that add-on
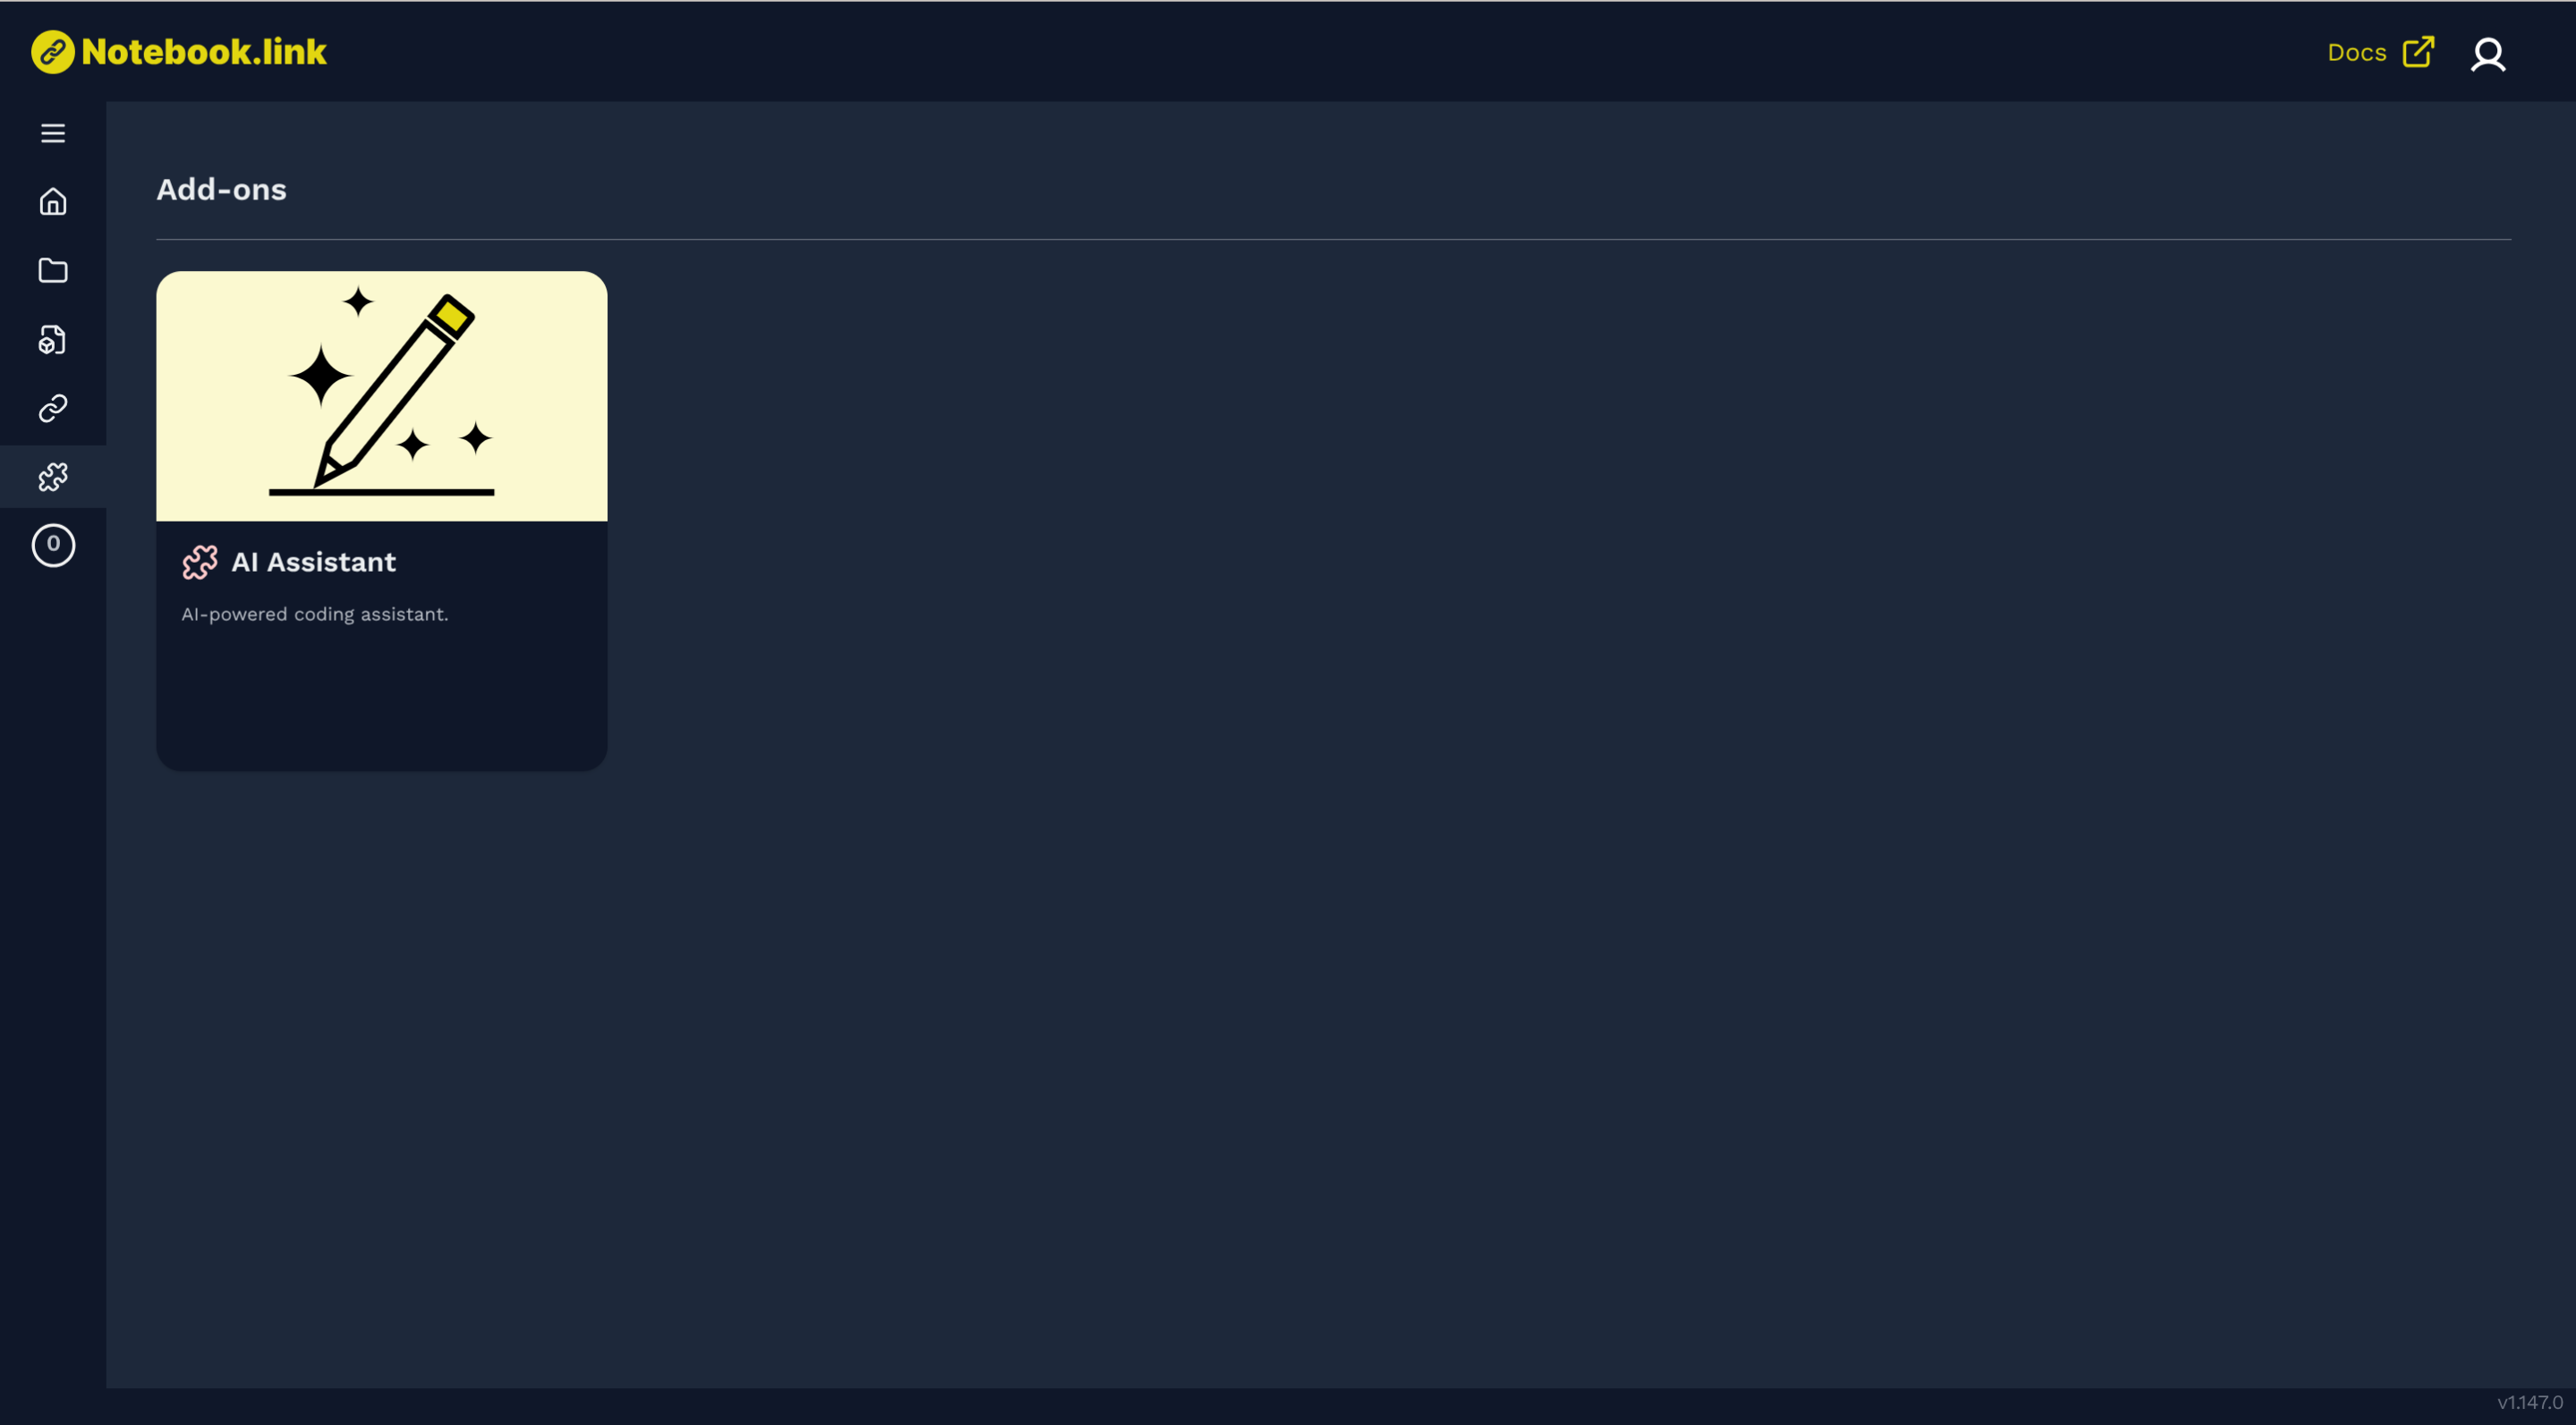
Note: The puzzle icon color indicates configuration status:
- Green: Configured
- Red: Not configured
Configuration and Activation
Add-ons require configuration before they can be activated for projects.
Configuring the AI Add-on
To configure the AI Assistant add-on:
- Select an AI provider from the dropdown menu
- Enter your API key
- Save the configuration
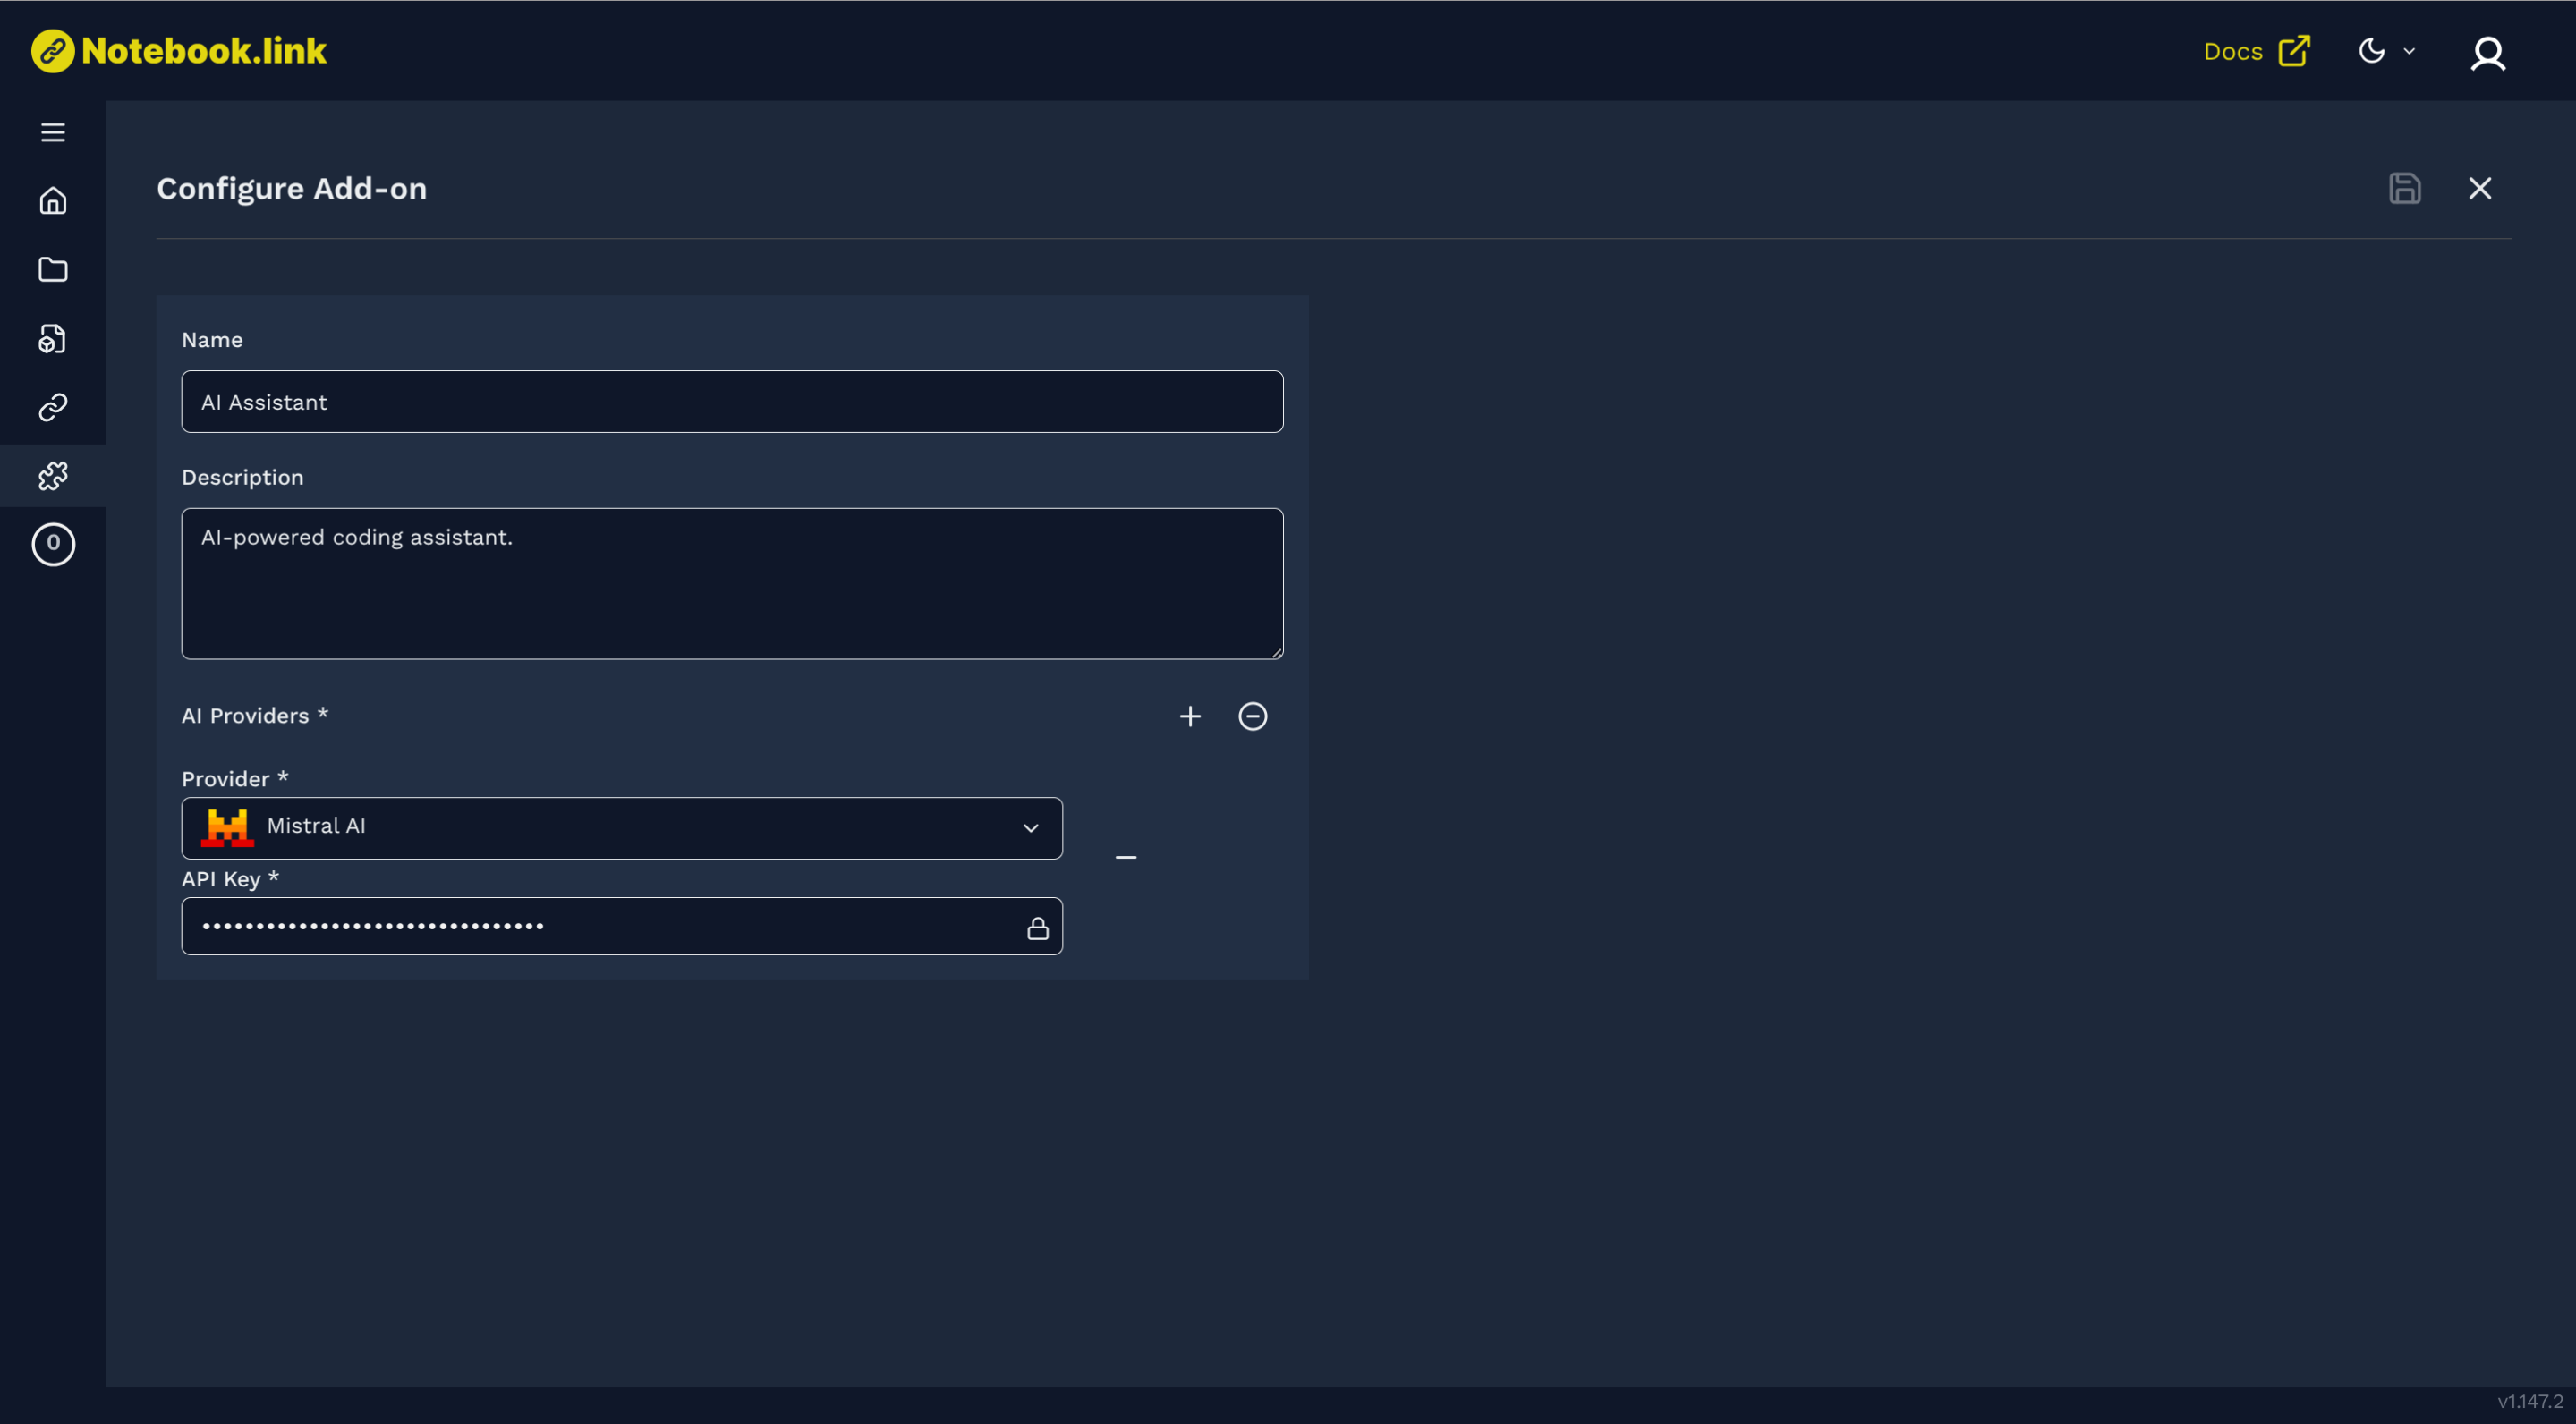
Currently supports three providers:
- OpenAI
- Mistral AI
- Anthropic
Activating the AI Add-on
When creating or editing a project:
- Locate the AI Assistant in the
Create Projectpanel underAvailable add-ons - Toggle the activation switch
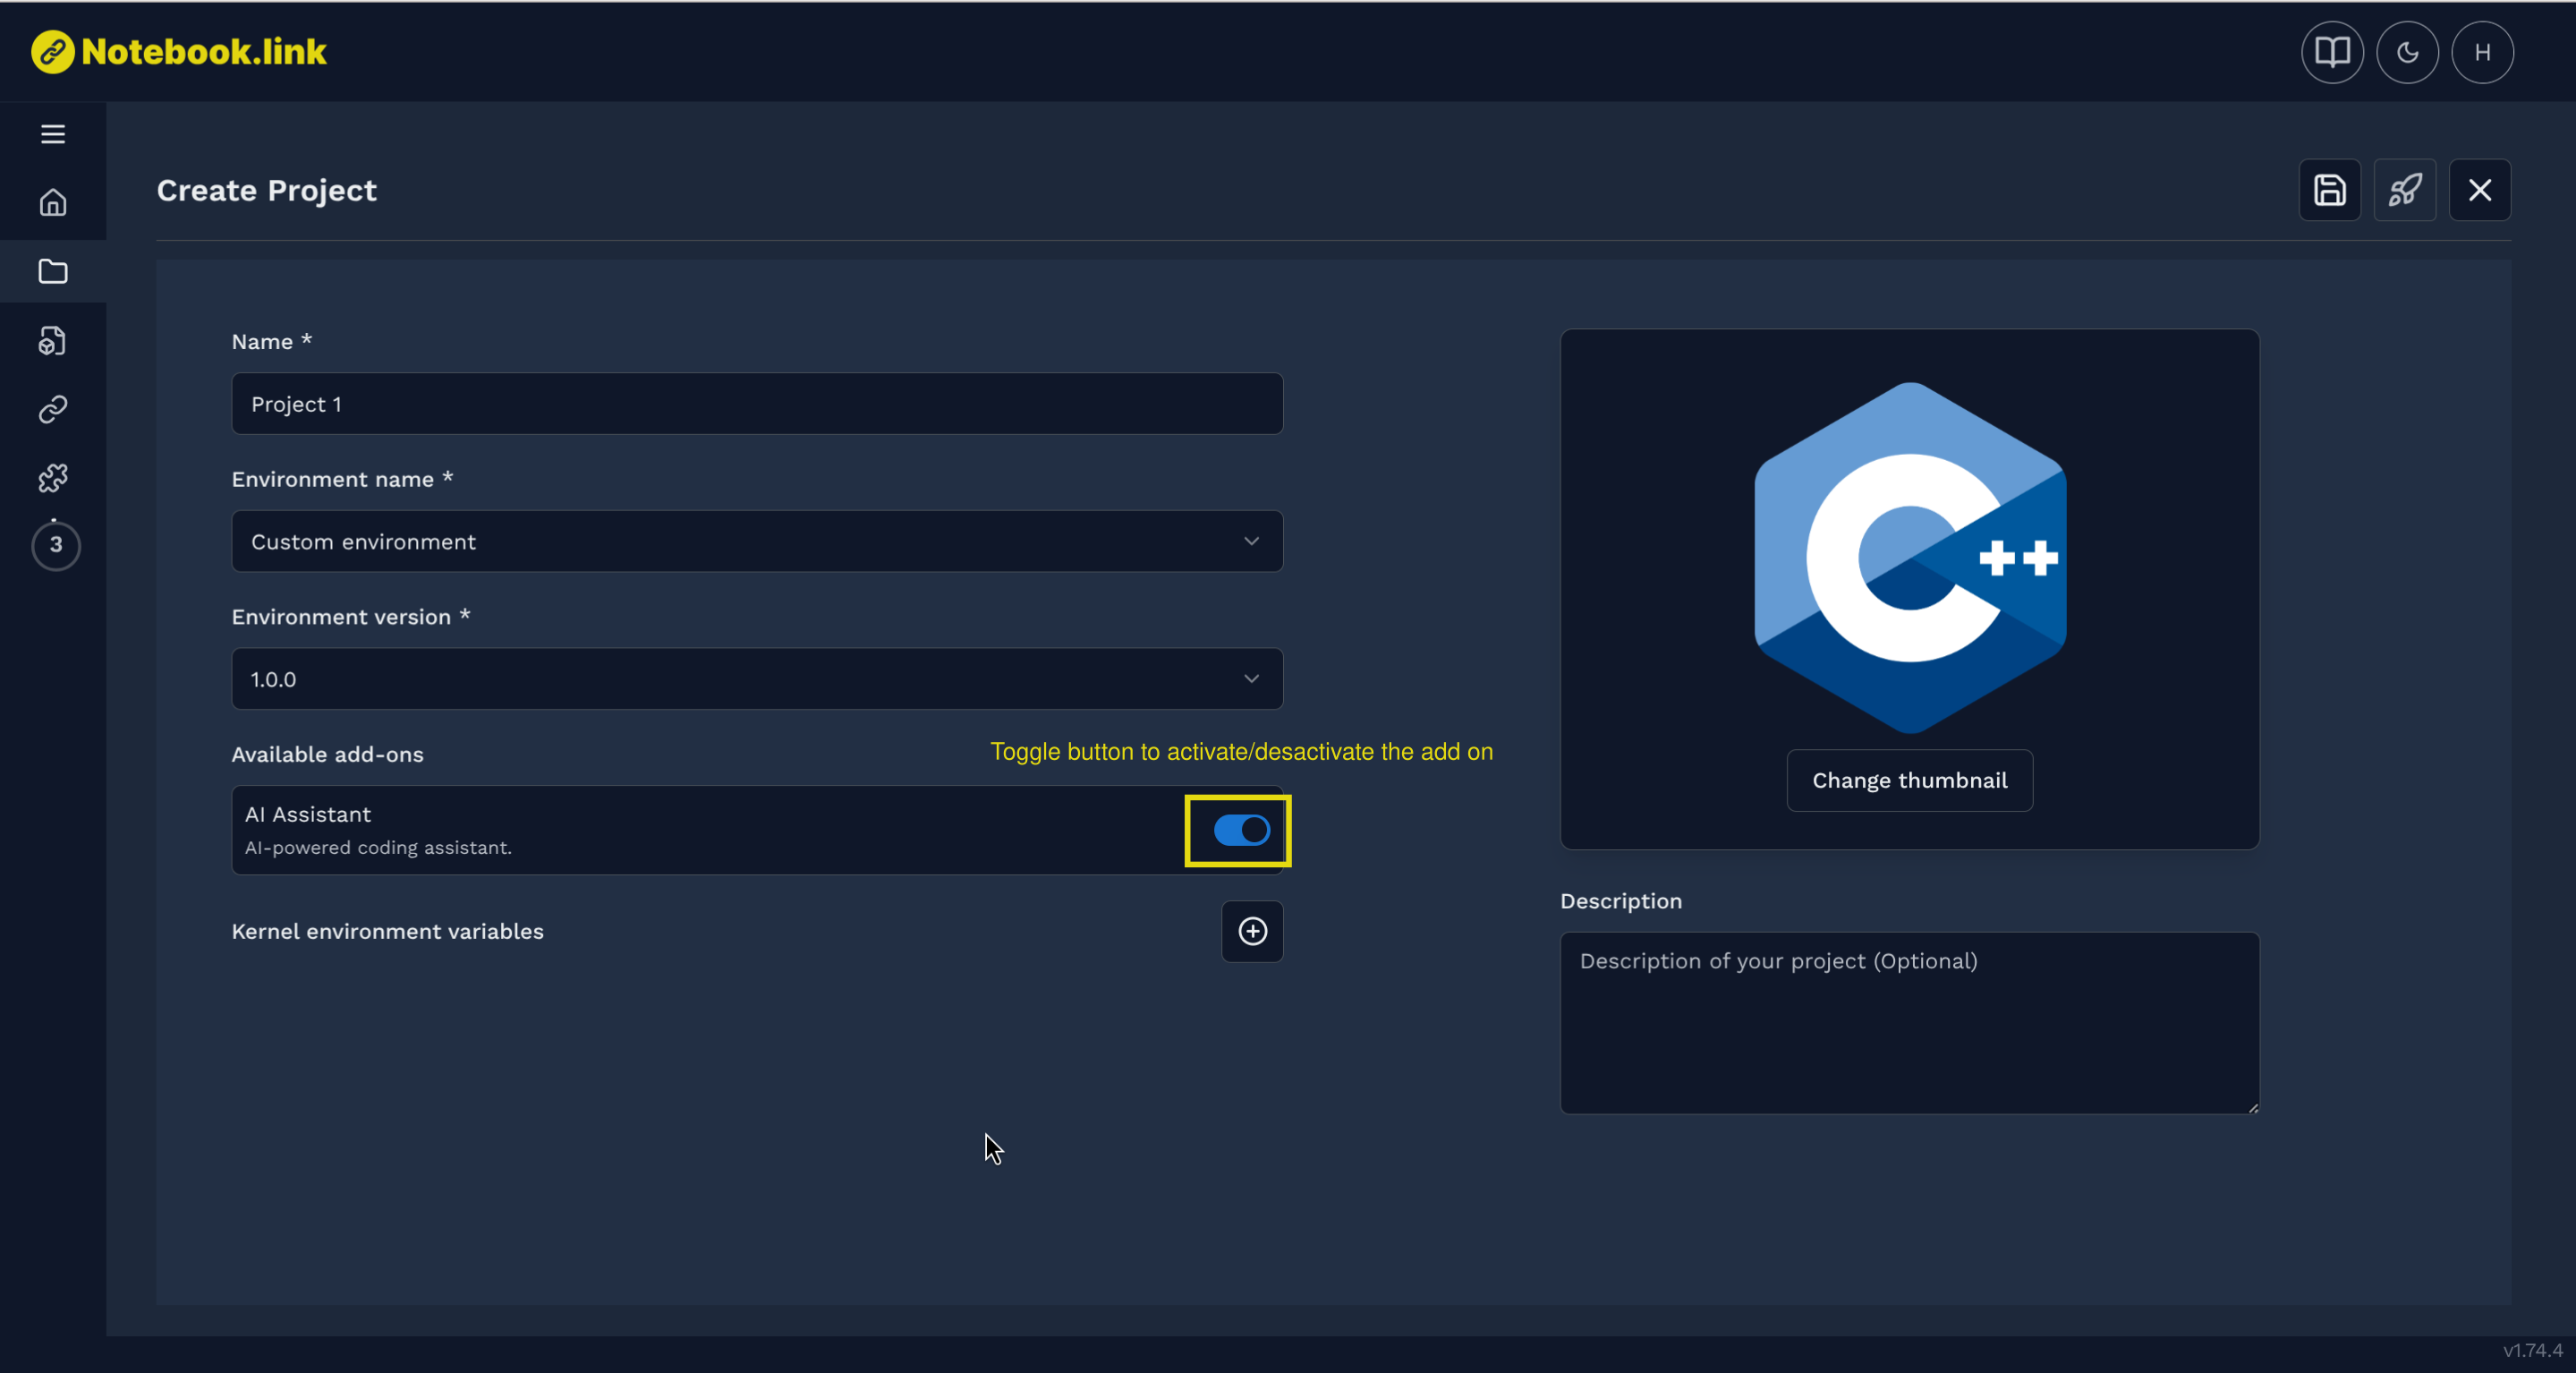
For existing projects: Update and save the project configuration to enable AI assistance.
More details about AI assistance in Jupyterlite at Using AI page